Jujutsu RETRO Combat Guide: Attack Keys, Techniques, Forms and Domain Expansion
Every key that starts a fight in Jujutsu RETRO: the M1 basic attack, the Z/X/C technique menu, F+Z form switches, Domain Expansion activation, and how wave PvE differs from Sandbox and PvP.
Quick answer
M1 is your basic attack. Your technique's moves live in a key-bound menu — Z, X and C, plus the F+C clone combo — while F+Z switches your technique's form and the top-right HUD switcher toggles SANDBOX and PVP. Domain Expansion comes from a blessing card: the unlock prompt says press F to expand it, and recorded play also expanded it with T.
- Z / X / C cast the moves of your technique menu — shown here on Mahito's Idle Transfiguration; other techniques may bind different moves to the same keys.
- V (Instant Spirit) starts locked, shown in red with the hint 'NEEDS BLACK FLASH'.
- F+Z cycles forms like MURDEROUS BODY and WEAPONRY; each form has its own skill list, and WEAPONRY's Blade Arms turns M1 into dual-blade slashes.
- Wave runs (PvE) are structured battles against NPC curses with elite leaders, bosses and between-wave blessing picks; Sandbox is a flat test map where you can drill every key safely.
The technique menu: your move list
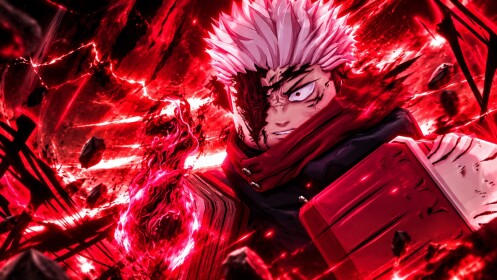
Everything past the basic M1 comes from your chosen cursed technique, played through a menu of key-bound moves. The menu shown here belongs to Mahito's Idle Transfiguration — the full kit list lives in our cursed techniques guide, and other techniques may bind different moves to these same keys.
Idle Transfiguration menu (base form)
- Key
- Z
- Menu entry
- Idle Transfigurat — Touch the Soul
- What it does
- The kit's signature entry, carrying the technique's own name.
- Key
- X
- Menu entry
- Hands
- What it does
- A rapid smash plus a ranged projectile.
- Key
- C
- Menu entry
- Single Body Repel
- What it does
- A knock-back kill move.
- Key
- F+C
- Menu entry
- Multiple Body
- What it does
- Summons clones — a duplicate of you joins the fight.
- Key
- F+Z
- Menu entry
- Self-Transfiguration (Switch Mode)
- What it does
- Switches your technique between forms, covered below.
- Key
- V
- Menu entry
- Instant Spirit
- What it does
- Locked at first — shown in red with the hint 'NEEDS BLACK FLASH'.
Two panel details matter before your first real fight. The technique panel lists a Cursed Energy cost per ability — the domain entry SELF-EMBODIMENT is priced at 1200 CE — next to an OUTPUT percentage meter. And your Domain Expansion sits in this same menu as the SELF-EMBODIMENT entry; how you earn it and which key fires it is covered just below.
Forms: F+Z rewires your keys
Pressing F+Z (Self-Transfiguration — Switch Mode) doesn't just cast a move; it swaps your technique into a different form, and every form relabels the menu with its own skills:
- MURDEROUS BODY — Hand Smash, Chain Mail Arm, Spike Ball, and Clone on F+C, which summons a duplicate of the player.
- BODY DYSMORPHIA — Bodily Evasive shrinks your character down, while Horse Legs extends your lower body.
- WEAPONRY — Blade Arms turns your basic M1 into dual-blade slashes for as long as the form is active, Polymorphic raises three bodyguard figures from the ground, and a Black Arms toggle sits alongside them.
Because skill names are form-specific, re-check the menu after every F+Z so you know what your keys currently do.
Domain Expansion: blessing card first, then expand
Your domain isn't something you start with — it arrives as a blessing-card drop during a wave run. In the recorded session, a golden-bordered card reading DOMAIN EXPANSION — SELF-EMBODIMENT OF PERFECTION appeared in the wave-3 blessing choice; picking it played a full-screen kanji cutscene (領域展開) with the prompt 'PRESS F TO EXPAND IT — LEGENDARY'.
One honest caveat about the key: the unlock prompt says F, but in actual play the player expanded the domain in Sandbox by pressing T — the exact live binding doesn't line up across the material. Once your card is picked up, test F and then T somewhere safe. When it fires, a dark barrier forms and large pale hands interweave into a spherical enclosure that shatters into light shards when the domain ends — and it isn't just a Sandbox toy, because it was also activated during the wave-10 boss fight. Per-domain details live in our domain expansions guide.
Sandbox vs PvP: the top-right switcher
Modes aren't bound to a key — a switcher in the top-right of the HUD toggles between SANDBOX and PVP. Sandbox is an open, flat test map with an HQ building, and it's where every technique in the recording was tested freely; it's the natural place to drill the keys above and watch your CE costs without pressure.
The PVP side was only observed through its label, which read 'THIS IS SAFE / OFF' — what that indicator changes in practice wasn't demonstrated, so treat the switcher itself as your source of truth for which mode you're in. For deeper reading on both directions, see the PvP guide and PvE guide, or the full game modes overview.
Inside a wave run: packs, leaders and bosses
Wave battles are the structured PvE side: you clear waves of NPC curses on named maps at a chosen difficulty — the recorded run used OUTSKIRTS EASY and MEADOW CITY EASY, with headers like WAVE 10/20. Small curses come in packs, and they don't always fight alone:
- WAVE 04 spawns THE LEADER, an elite curse, under the banner 'KILL IT OR THE PACK EMPOWERS'. If the leader survives, the status flips to 'LEADER LIVES! PACK EMPOWERED'. The banners don't quantify the empowerment, but the intent is plain: kill the leader.
- WAVE 10 opens a boss. The warning 'A PLAGUE SEEPS FROM THE EARTH...' precedes the boss health bar SMALLPOX DEITY — SPECIAL GRADE CURSED SPIRIT.
Chain kills feed an EXORCISM STREAK counter — it reached x5 and x22 during the recorded run — and every wave break offers a blessing choice: percentage cards like MAX CURSED ENERGY +17%, CURSED POWER +5% and HEALTH +10% (a +2% CURSED POWER variant also exists), plus occasionally the golden Domain Expansion card from the section above. For surviving the later waves in detail, see the initiation wave survival guide.
What fighting pays out
Combat visibly moves several trackers at once. Level-ups pop as banners like 'LEVEL 2 PROMOTED'; technique mastery rows tick upward in the menu (IDLE TRANSFIGURATION Lv 3 +45 XP); the top-right currency counter — a yen-style money display — climbed from 946 to 4,099 over the recorded run, while GRADE rank progress moved from GRADE 4 to GRADE 2. Those counters are the visible edge of progression; our progression guide follows what to do with it.
Your first session, in order
Checklist
- Pick your cursed technique
Your whole move list comes from it. The keys in this guide are Mahito's Idle Transfiguration; other techniques bind their own moves to the menu.
- Drill every key in Sandbox
Flip the top-right switcher to SANDBOX — a flat test map with an HQ building — and try Z, X, C, F+C and every F+Z form while watching CE costs and the OUTPUT meter.
- Take a wave run
Expect packs of curses, an elite leader around wave 4 and a boss by wave 10; keep your EXORCISM STREAK alive as you clear.
- Spend blessings deliberately
Percentage cards boost MAX CURSED ENERGY, CURSED POWER or HEALTH, and the golden DOMAIN EXPANSION card unlocks your domain — then test F, and T, to expand it.
Where to go next
- Combat combos — for turning the keys above into sequences.
- How to awaken cursed techniques — for taking a kit beyond its base form.
Content and balance shift over time: the updates page tracks changes, and the codes page keeps the current list of redeemable codes." }
Related Guides
Mahito Combos and Inputs
Practice Mahito combo routes with exact inputs, from basic strings into form changes and Domain Expansion.
Domain Expansion: Self-Embodiment of Perfection
Learn what Self-Embodiment of Perfection does, how to unlock it and how to activate it mid-fight.
PvE Guide: Enemy Attacks and Boss Behaviors
Study every enemy attack pattern and boss behavior so Initiation and colony encounters stop surprising you.